Configuring Policies
Policies determine how your application handles transaction fees for users. There are four main configurations to consider:
- Enabling ERC20 Payments
- Discounts per Address
- Offers for all addresses
- Specify Callbacks
Enabling ERC20 Payments
- Go to the “API Keys” tab and select the desired APIKey to configure
- Click in the “Policies” tab
- Click on the ERC-20 Payment toggle
- Select Between the Payment modes: Pre-Payment and Post Payment or only Pre-Payment
Figure 1: Configuring a Gas Policy
Selecting tokens that supports Gas Payment
Here you can select any ERC20 token you wish to receive as Payment for Gas.
- Click on the “Select” button
- Select the tokens on the list or Input a Token contract in the text field to make it appear on the list
- “Confirm” your selection
- Configure the Gas-Payment Floating rate.
- Click in the “Save” button at the end of the dashboard.
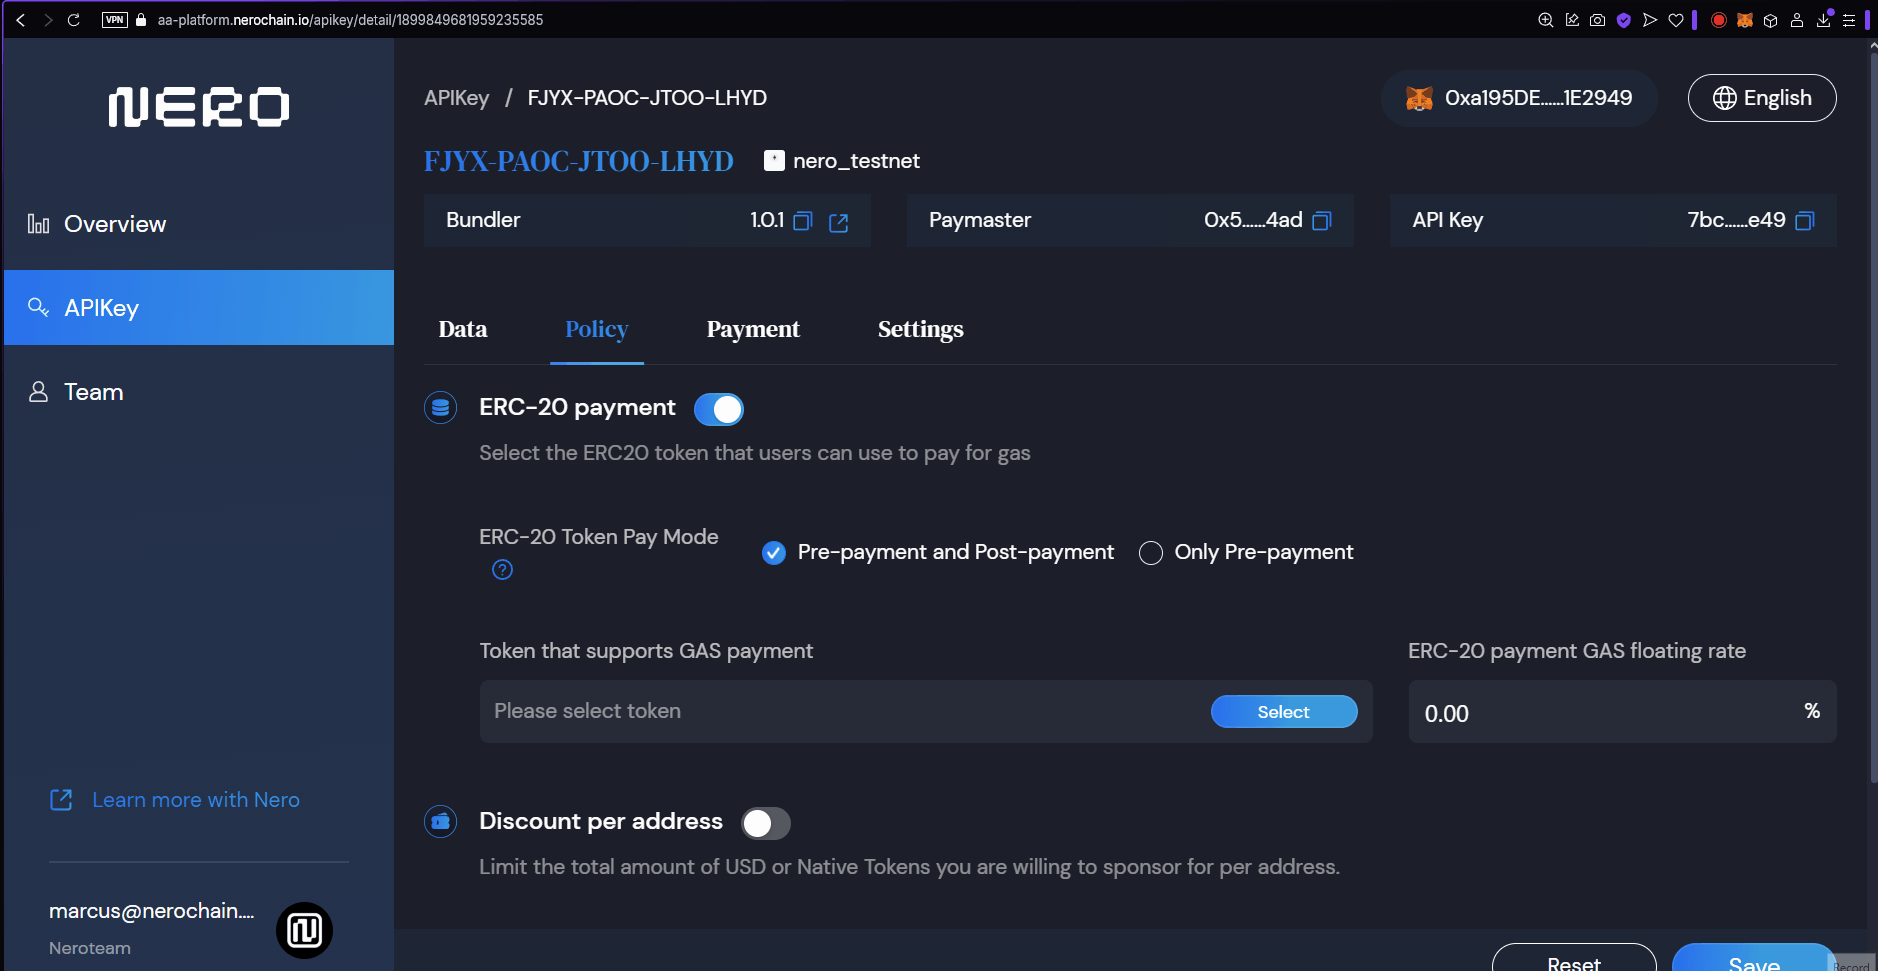
Figure 2: Selecting Tokens for Gas Supported.
Strategy Types Explained
Free Gas (Type 0)
With this strategy, you fully cover the gas costs for your users. This is ideal for:
- Onboarding new users who don’t own crypto
- Promotional campaigns
- Applications where you want to remove all friction
- GameFi applications where you want to hide blockchain complexity
ERC20 Prepay (Type 1)
Users pay for gas using ERC20 tokens before the transaction is executed:
- The full estimated amount is collected upfront
- Any excess is refunded after execution
- More secure for the developer as payment is guaranteed
- Better suited for high-value operations
ERC20 Postpay (Type 2)
Users pay for gas using ERC20 tokens after the transaction is executed:
- Only the exact gas cost is collected
- Requires token approval before execution
- Slightly better UX as users only pay what’s needed
- Has a risk of payment failure after execution
Giving Discounts per Address
You can configure the total USD or native tokens you are willing to sponsor per address.
- On the Policies tab, toggle the “Discount per address” option
- Configure the amount of times per address per day, week , or month modes.
- Maximum free amount per new address : you can use this to set a total limit you can sponsor per address
- You can also set the amount of overral free times an address can be sponsored.
- Click on the “Save” button.
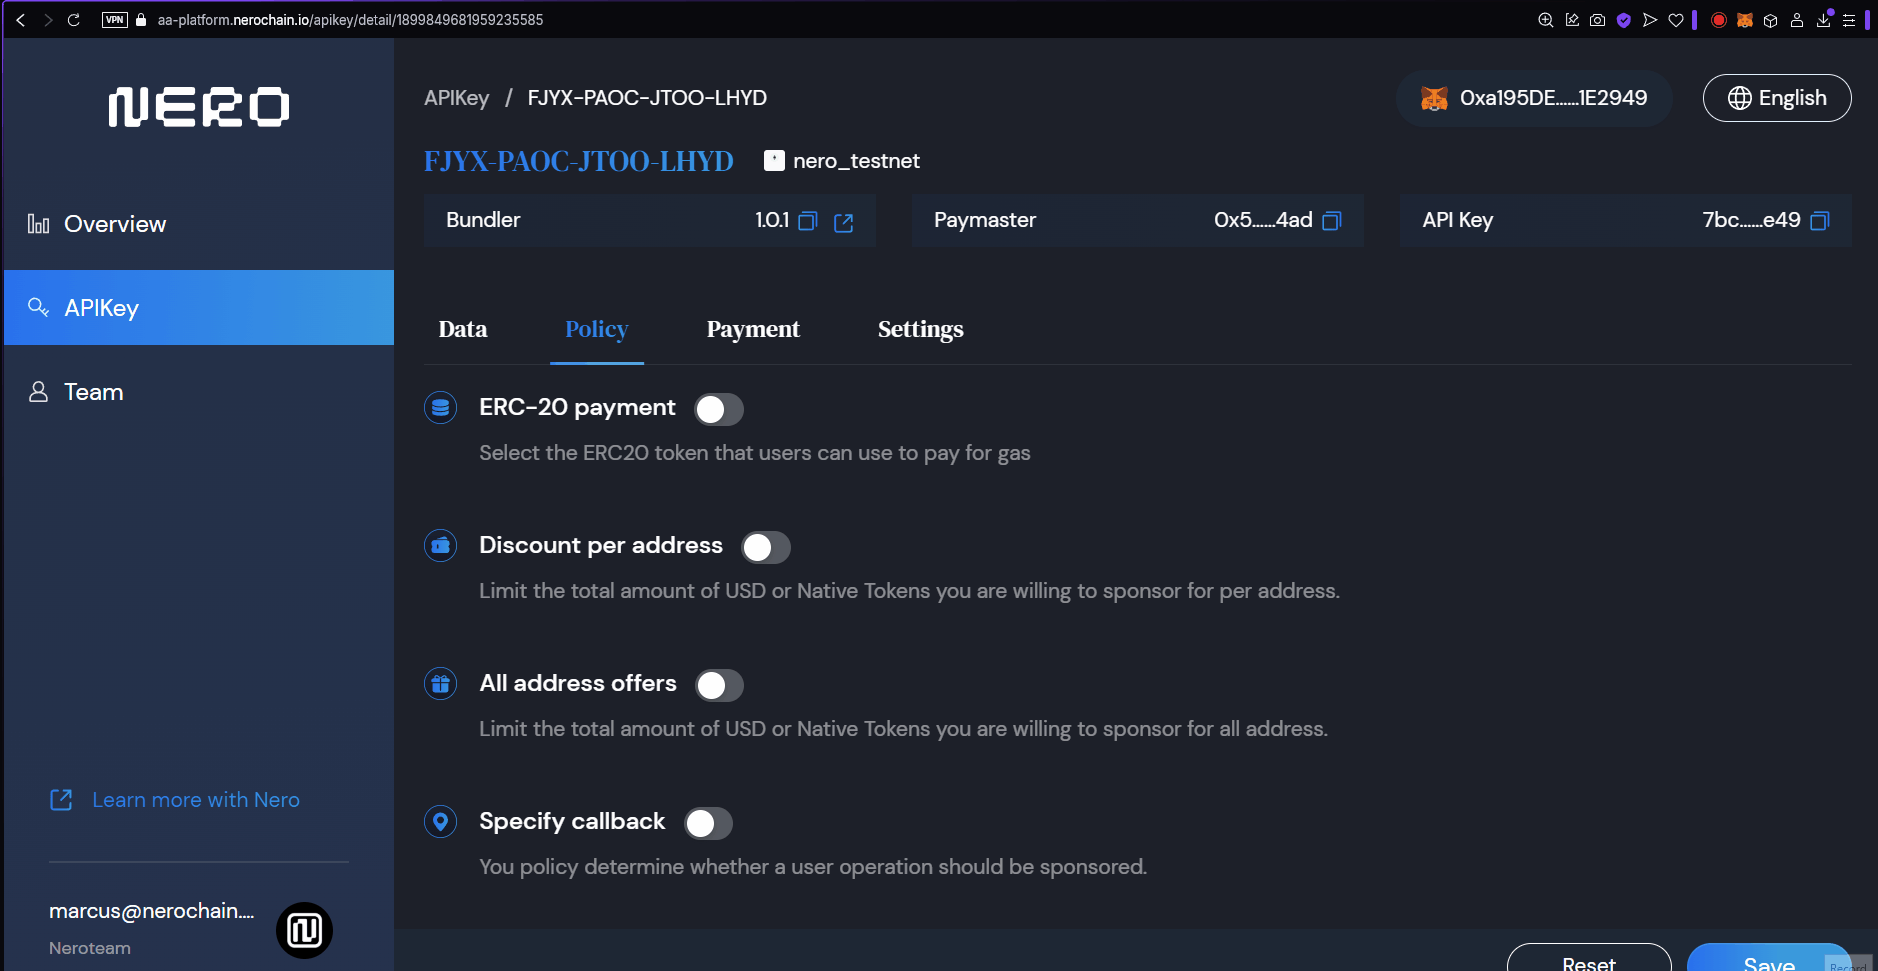
Figure 3: Configuring Discounts.
Offers for all addresses
You can also have a similar configuration configured for all address at the same time.
- On the Policies tab, toggle the “All Addresses offer” option
- Configure the amount of times per address per day, week , or month modes.
- Maximum free amount per new address : you can use this to set a total limit you can sponsor per address
- You can also set the amount of overral free times an address can be sponsored.
- Click on the “Save” button.
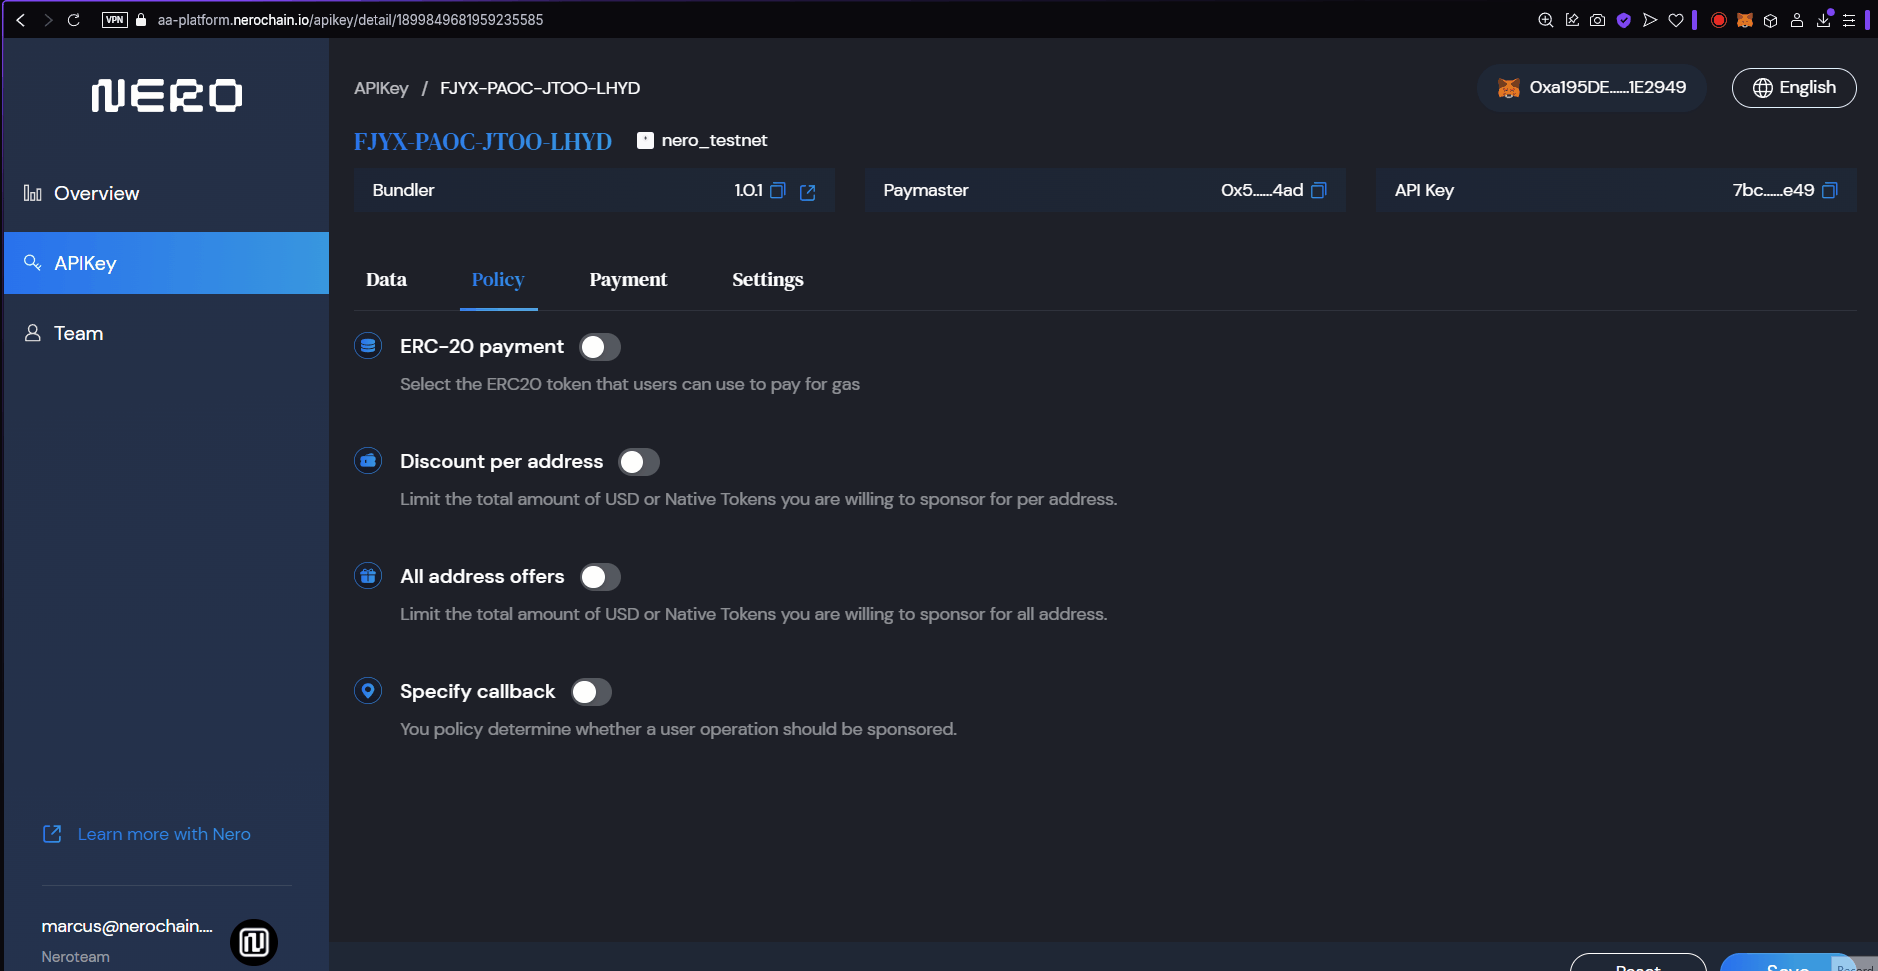
Figure 4: Configuring Discounts for all addresses.
Specify Callbacks
You can set specific addresses wheter a user operation should be sponsored or not.
- Toggle the “Specify Callback” option.
- Set the address
- Save
Next Steps
After configuring your policies, you should:
- Manage your payments to ensure sufficient funds for your strategies
- Integrate with your application to start using your configured policies