Deploying Your First Contract on NERO Chain Using Remix
This tutorial will guide you through the process of creating and deploying a smart contract on NERO Chain using the Remix IDE. Remix is a popular, browser-based development environment that requires no setup, making it perfect for beginners.
Prerequisites
- A Web3 wallet (like MetaMask) installed in your browser
- Basic knowledge of Solidity programming language
- Some NERO testnet tokens for gas fees (get them from the NERO Faucet)
Setting Up Your Environment
1. Connect Your Wallet to NERO Chain
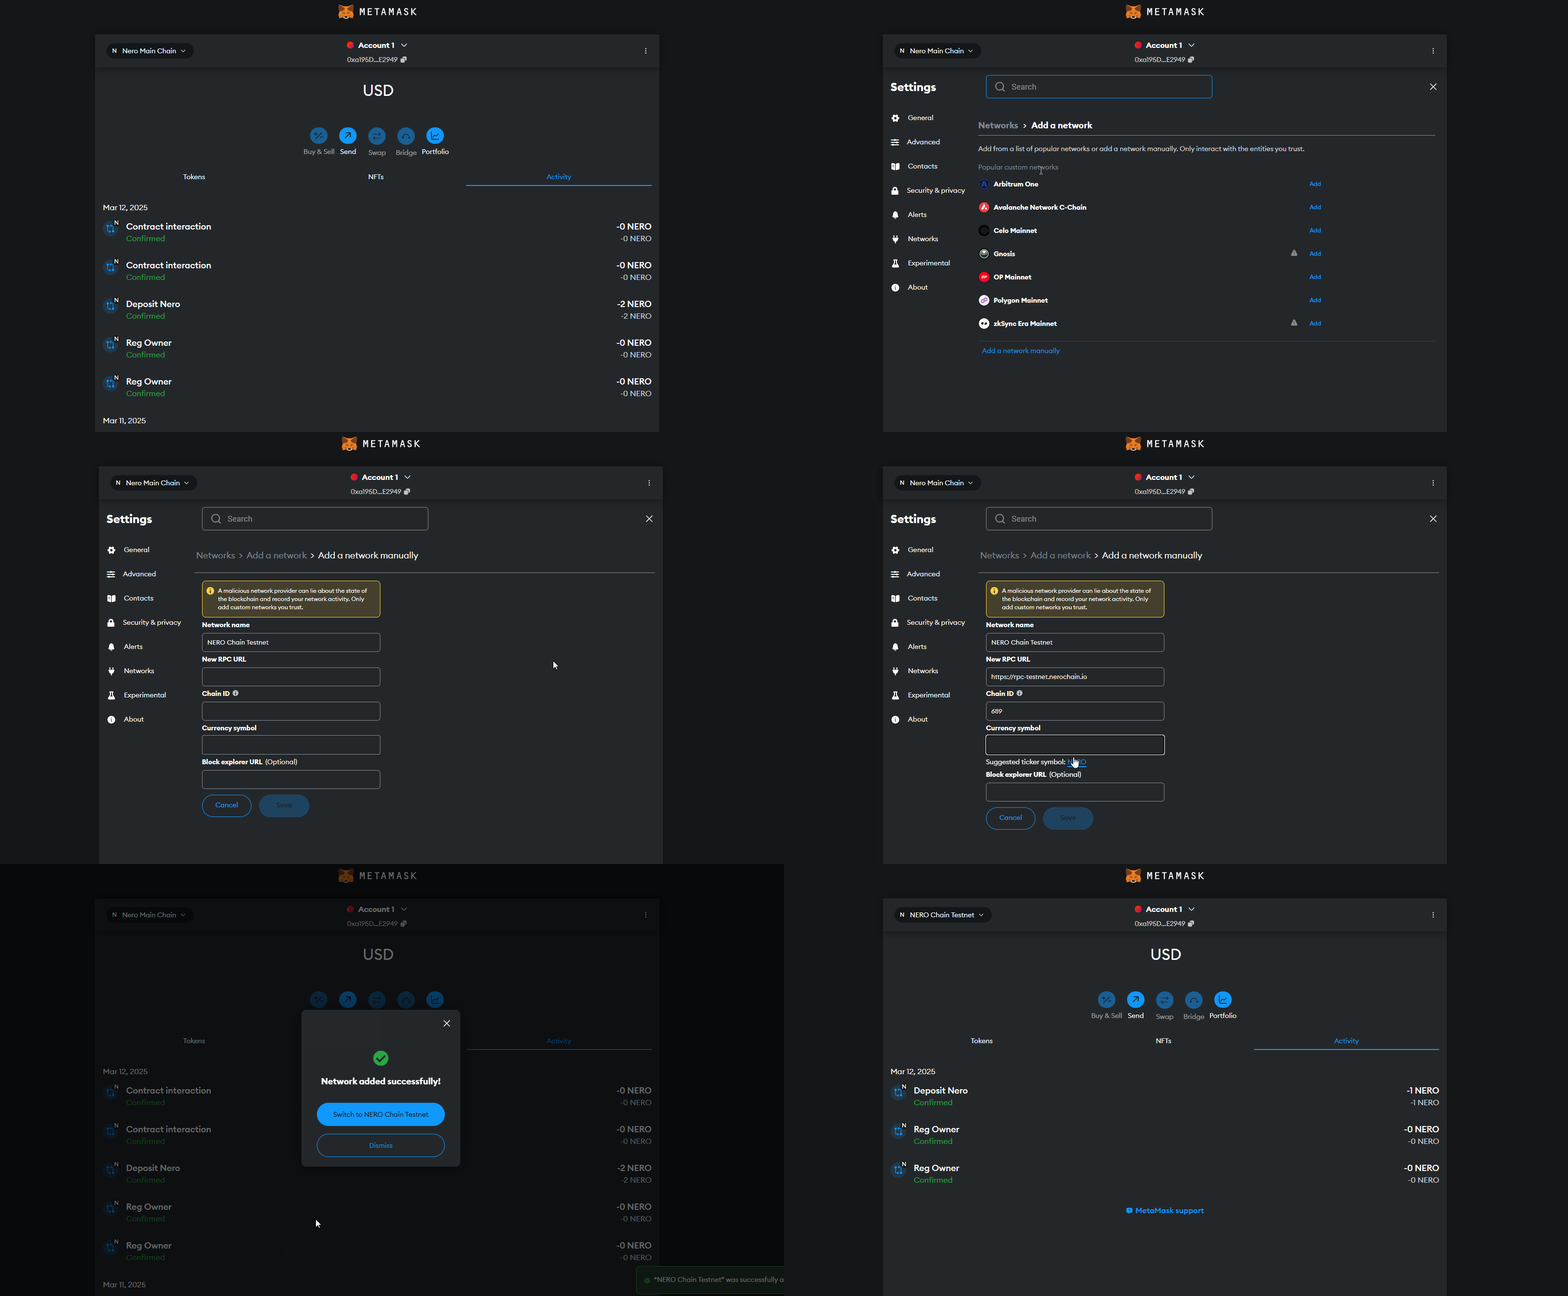
Before we start, you need to add NERO Chain to your MetaMask wallet:
- Open MetaMask and click on the network dropdown at the top
- Select “Add Network”
- For the NERO Testnet, use these settings:
- Network Name:
NERO Testnet - RPC URL:
https://rpc-testnet.nerochain.io - Chain ID:
689 - Currency Symbol:
NERO - Block Explorer URL:
https://testnet.neroscan.io
- Network Name:
2. Open Remix IDE
Navigate to Remix IDE in your browser.
Creating a Simple Smart Contract
Let’s create a simple “Hello World” contract with storage functionality.
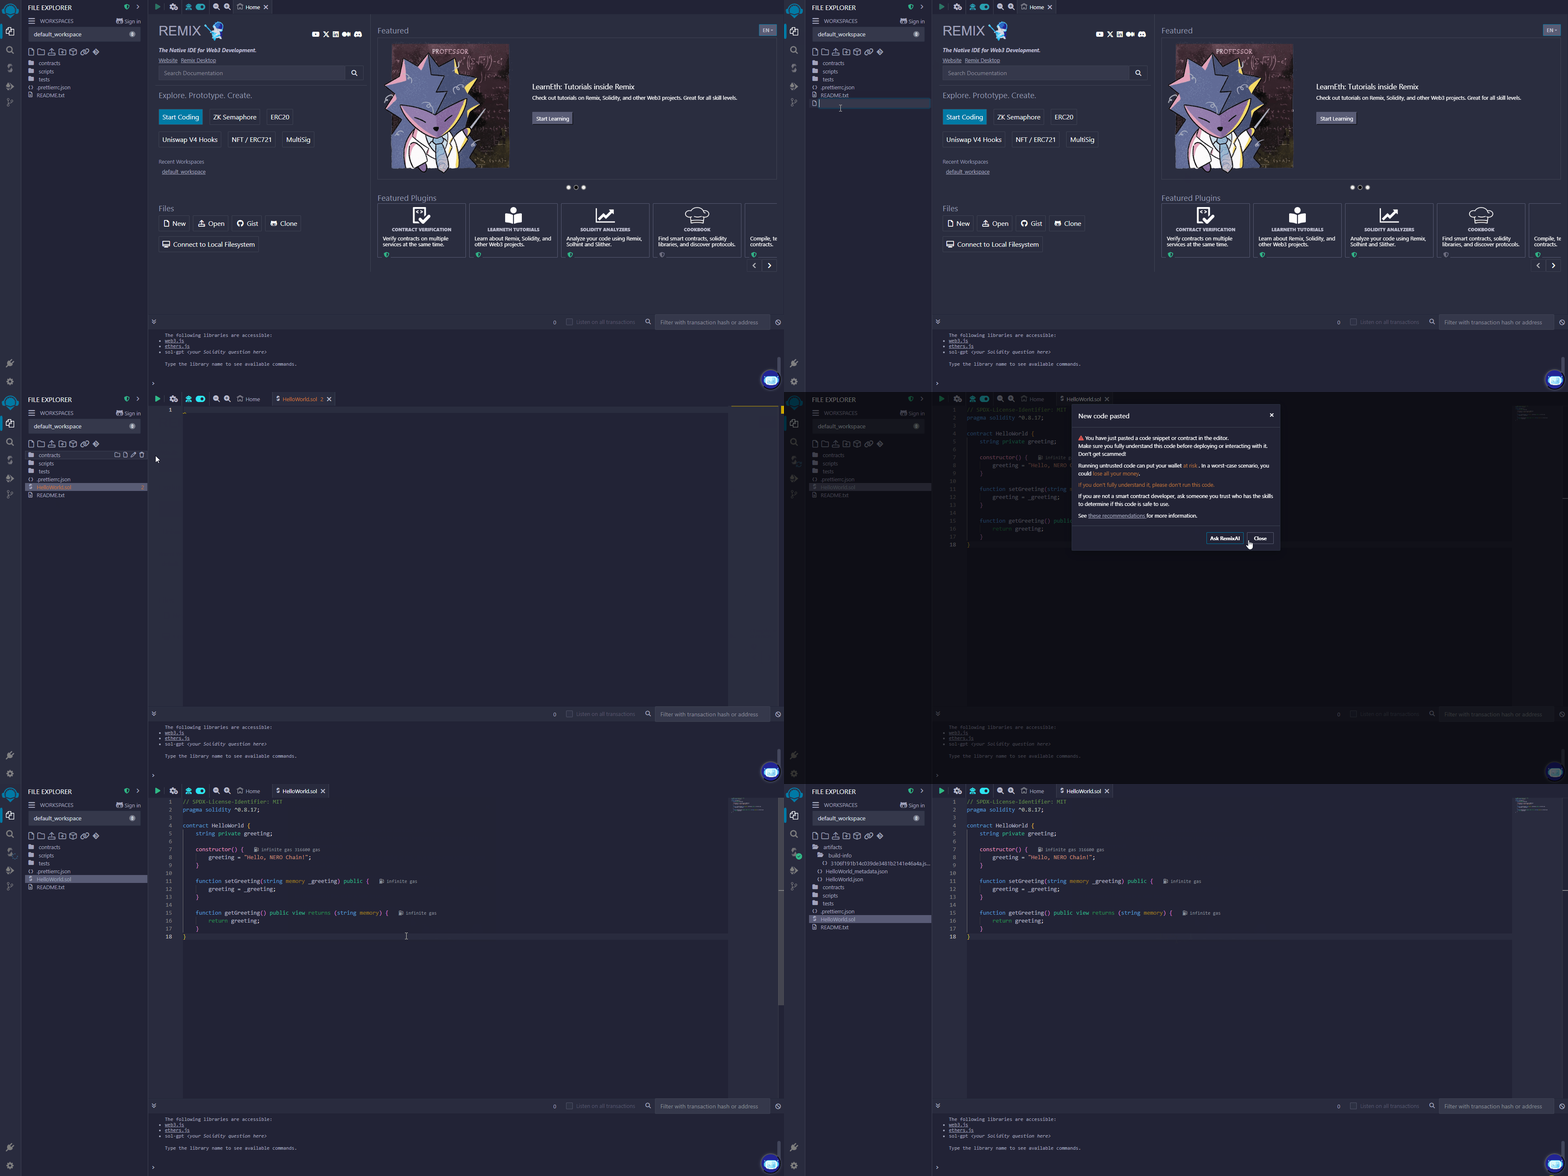
1. Create a New File
In Remix:
- Click on the “File explorers” icon in the left sidebar
- Click the ”+” icon to create a new file
- Name it
HelloWorld.sol
2. Write Your Smart Contract
Copy and paste the following code into your new file:
// SPDX-License-Identifier: MIT
pragma solidity ^0.8.17;

contract HelloWorld {
    string private greeting;

    constructor() {
        greeting = "Hello, NERO Chain!";
    }

    function setGreeting(string memory _greeting) public {
        greeting = _greeting;
    }

    function getGreeting() public view returns (string memory) {
        return greeting;
    }
}
This simple contract:
- Stores a greeting message
- Allows anyone to update the greeting
- Provides a function to retrieve the current greeting
Compiling Your Contract
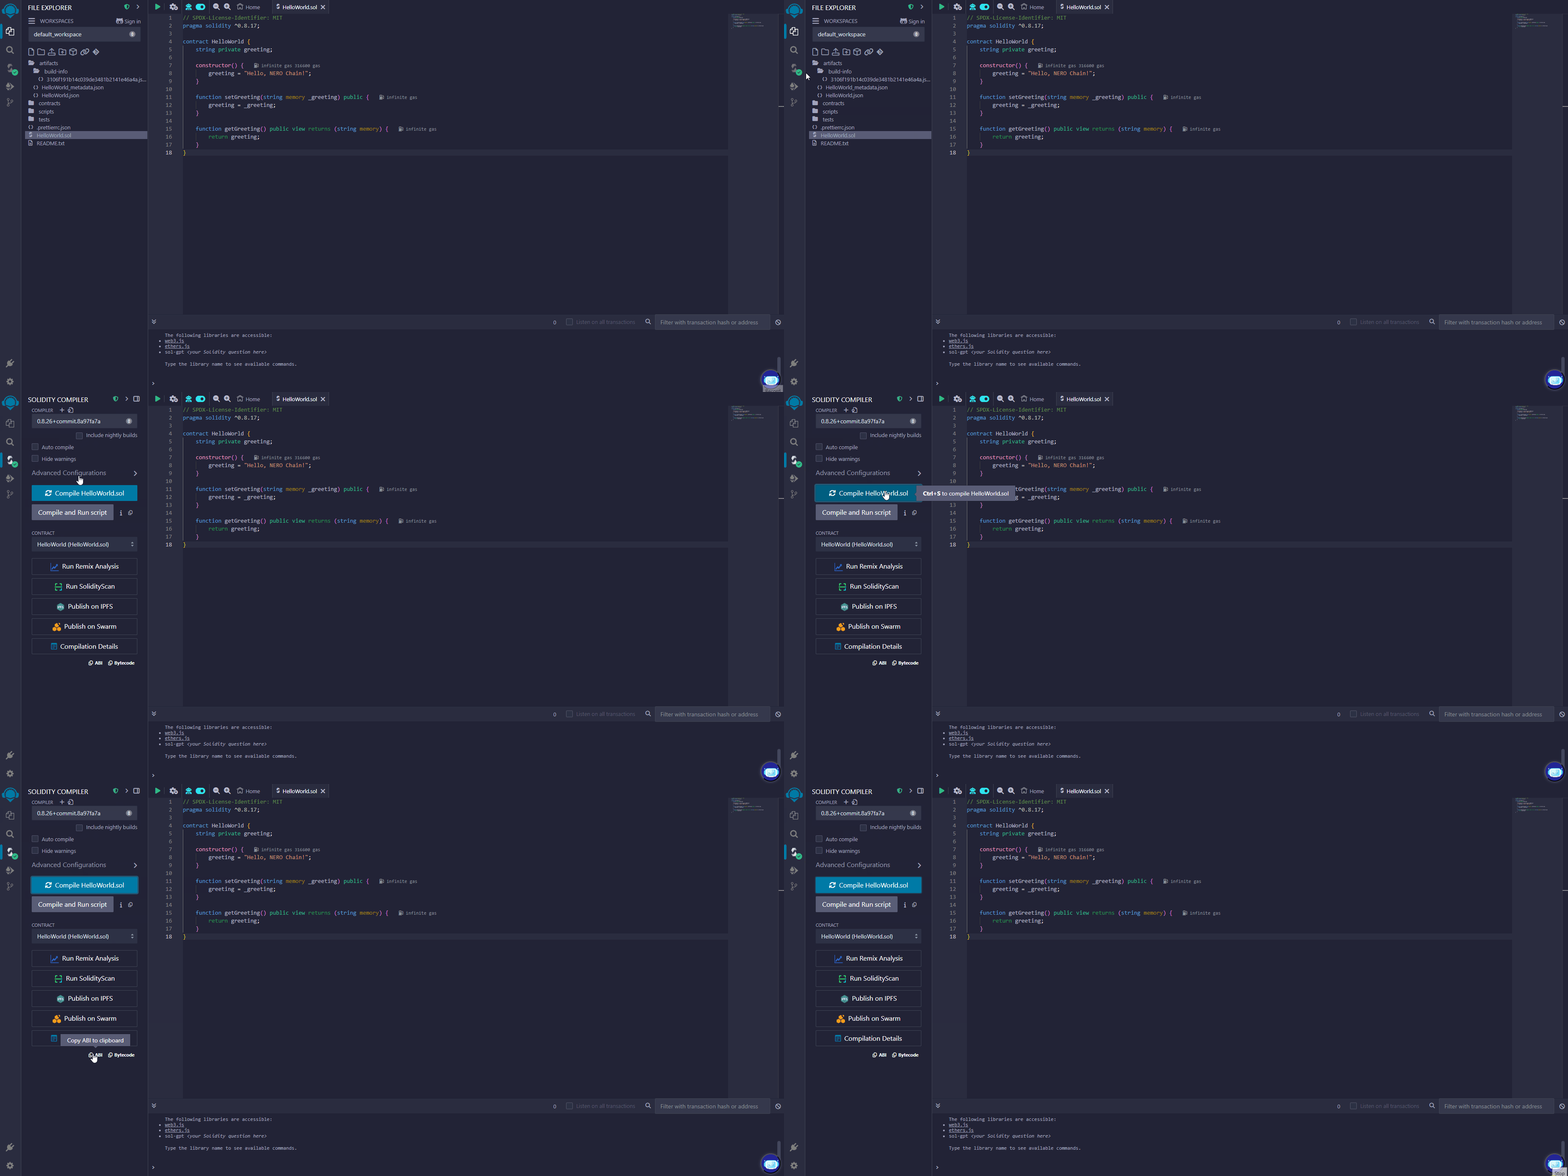
1. Navigate to the Compiler Tab
Click on the “Solidity compiler” icon in the left sidebar (the second icon).
2. Select Compiler Version
Choose a compiler version that matches your pragma statement (in our case, 0.8.17 or higher).
3. Compile the Contract
Click the “Compile HelloWorld.sol” button. If successful, you’ll see a green checkmark.
Deploying Your Contract
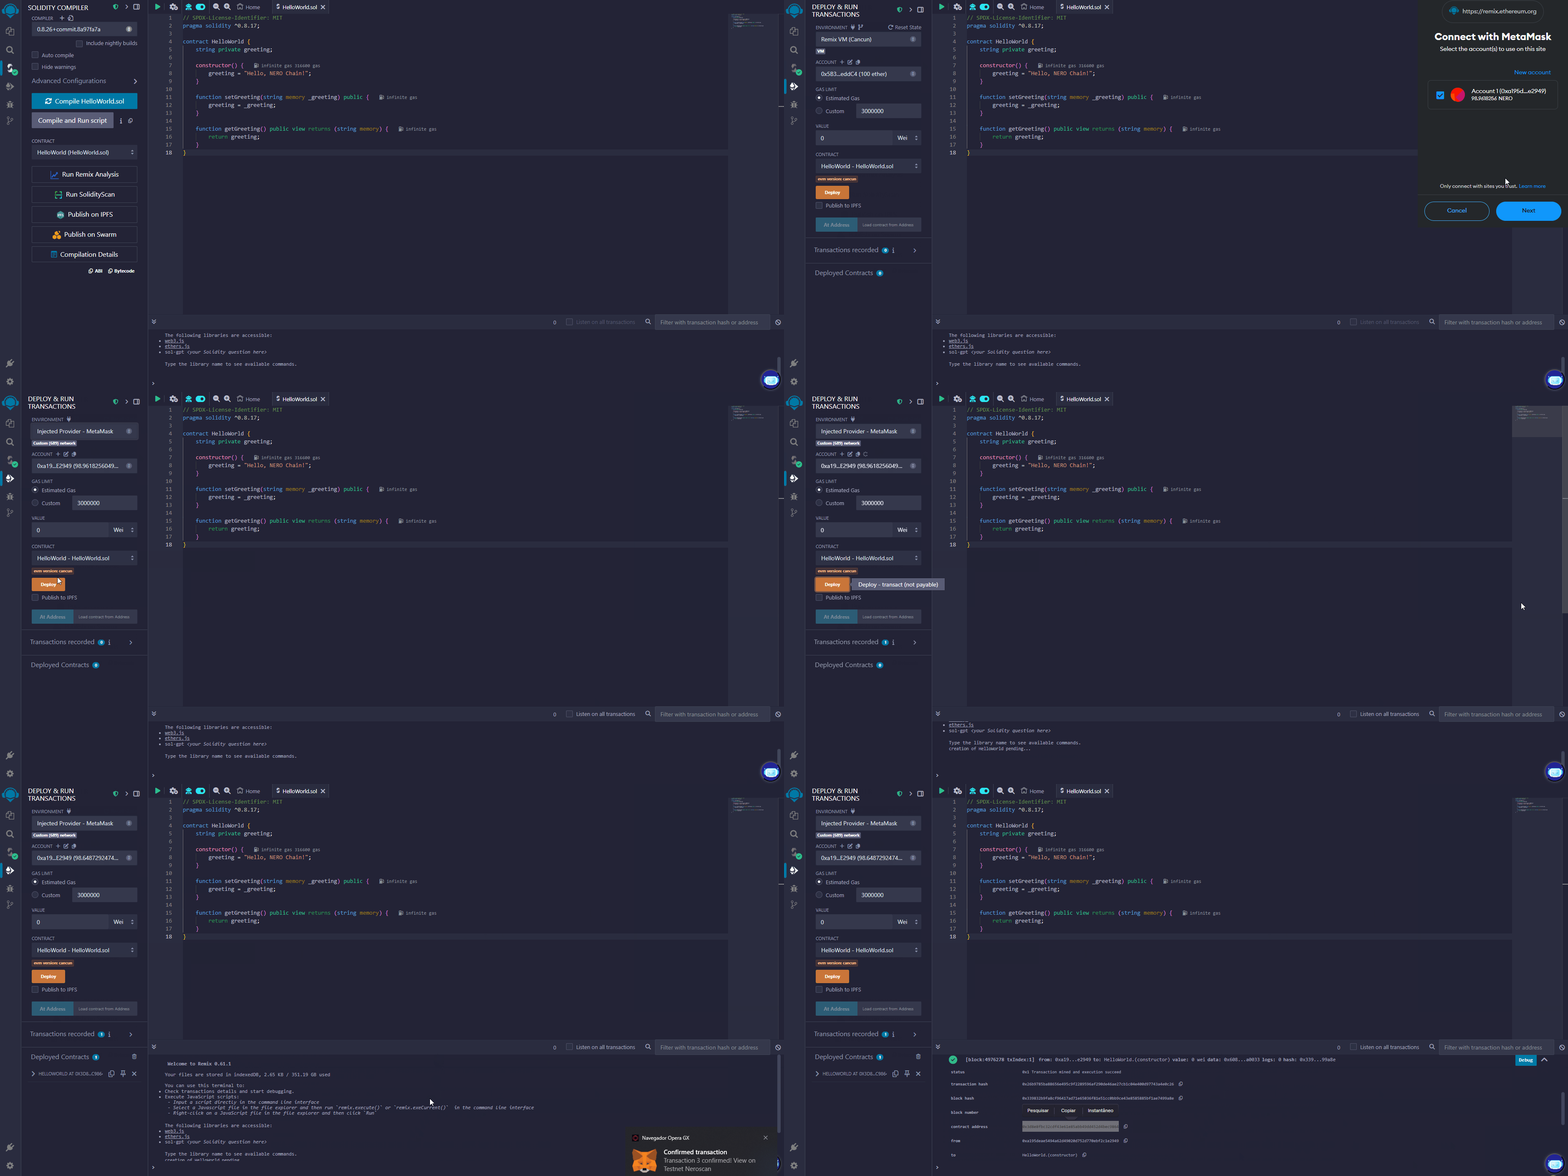
1. Navigate to the Deploy Tab
Click on the “Deploy & run transactions” icon in the left sidebar (the third icon).
2. Configure Environment
- From the “ENVIRONMENT” dropdown, select “Injected Provider - MetaMask”
- MetaMask will prompt you to connect - make sure you’re connected to NERO Testnet
- Confirm that the “ACCOUNT” field shows your wallet address
3. Deploy the Contract
- Ensure “HelloWorld” is selected in the “CONTRACT” dropdown
- Click the “Deploy” button
- MetaMask will prompt you to confirm the transaction - review the gas fees and click “Confirm”
- Wait for the transaction to be mined (this usually takes a few seconds on NERO Chain)
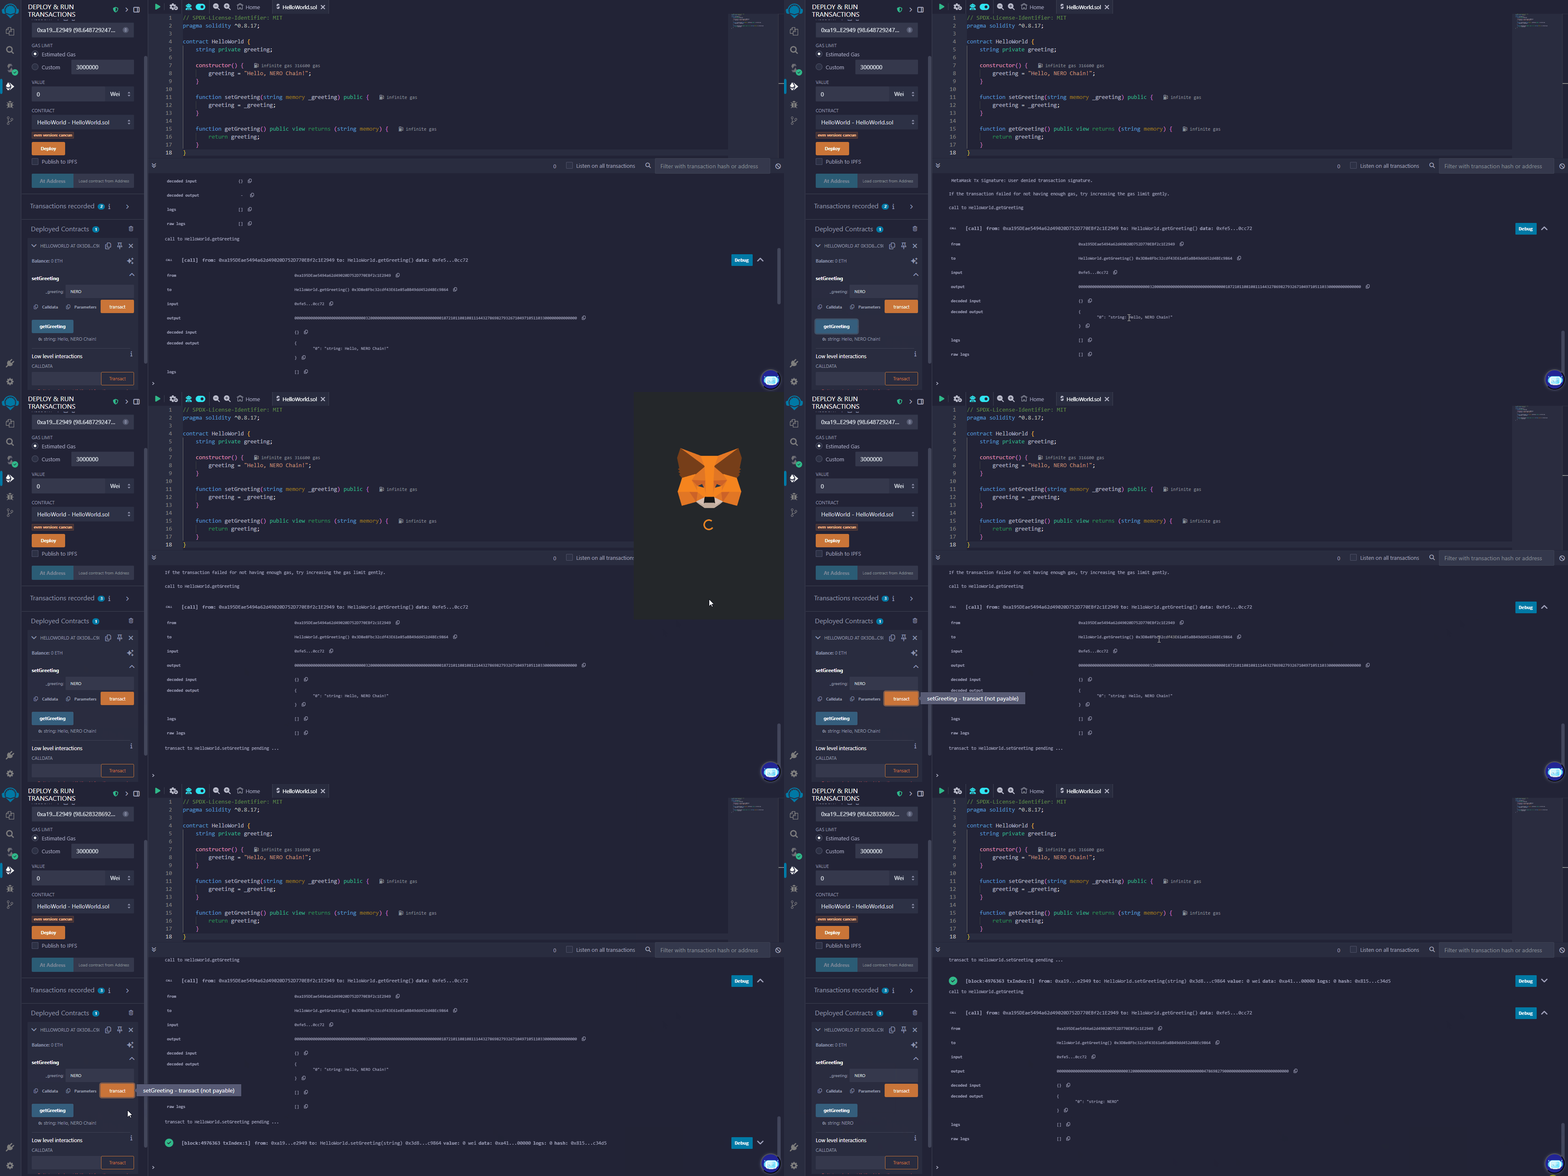
Interacting with Your Deployed Contract
Once deployed, your contract will appear under the “Deployed Contracts” section.
Reading the Greeting
- Expand your contract in the “Deployed Contracts” section
- Find the “getGreeting” function (blue button, indicating it’s a read-only function)
- Click it to retrieve the stored greeting
Updating the Greeting
- Find the “setGreeting” function (orange button, indicating it changes state)
- Enter a new greeting message in the input field
- Click the “setGreeting” button
- Confirm the transaction in MetaMask
- After the transaction is mined, you can call “getGreeting” again to verify the update
Verifying Your Contract on the Block Explorer
For others to interact with your contract and view its code, you should verify it on the block explorer:
- Copy your contract address from the “Deployed Contracts” section in Remix
- Visit the NERO Chain Explorer
- Paste your contract address in the search bar
- Click on the “Contract” tab
- Click “Verify and Publish”
- Fill in the required information:
- Contract Name:
HelloWorld - Compiler Version: The version you used (e.g.,
v0.8.17+commit.8df45f5f) - Open Source License Type:
MIT License (MIT)
- Contract Name:
- In the “Enter the Solidity Contract Code” field, paste your entire contract code
- Click “Verify and Publish”
Once verified, users can read your contract’s code and interact with it directly from the explorer.
Troubleshooting Common Issues
Transaction Failing
If your deployment transaction fails, check:
- Do you have enough NERO tokens for gas?
- Is your MetaMask connected to NERO Chain?
- Is there an error in your contract code?
High Gas Fees
NERO Chain has relatively low gas fees, but if they seem high:
- Check if you’re connected to the right network
- Try during a less busy time
Compiler Errors
If you encounter compiler errors:
- Make sure your Solidity version is compatible (0.8.0 or higher is recommended)
- Check for syntax errors
- Look for references to Ethereum-specific functions that might not be available on NERO Chain
Advanced Tips
Using Libraries
If you’re using external libraries:
- Import them using the import statement
- Make sure they’re compatible with NERO Chain
// Example of importing OpenZeppelin's ERC20 contract
import "@openzeppelin/contracts/token/ERC20/ERC20.sol";
Constructor Arguments
If your contract requires constructor arguments:
- Enter them in the field next to the “Deploy” button
- Separate multiple arguments with commas
Contract Size Limits
NERO Chain, like Ethereum, has a maximum contract size limit. If your contract is too large:
- Split it into multiple contracts
- Optimize your code
- Use libraries to reuse code
Next Steps
Now that you’ve deployed your first contract, you might want to:
- Learn about Account Abstraction on NERO Chain
- Explore Paymaster integration for gasless transactions
- Build a complete dApp with React
- Try deploying using Hardhat for more complex projects
- Try the high-level template for quick building
Conclusion
Congratulations! You’ve successfully deployed a smart contract on NERO Chain using Remix. This basic workflow—writing, compiling, deploying, and interacting with contracts—remains the same for more complex projects.
NERO Chain’s compatibility with Ethereum tools makes it easy to migrate existing projects or start new ones using familiar tools like Remix.