Verifying Smart Contracts through the NERO Explorer
This guide walks you through the process of verifying your smart contract on the NERO Chain Testnet using the block explorer interface. Contract verification makes your source code publicly viewable and allows users to interact with your contract directly through the explorer.
Prerequisites
- A deployed smart contract on NERO Chain
- The contract’s source code
- The contract’s deployment address
- Deployment parameters (compiler version, optimization settings, etc.)
Step 1: Access the NERO Chain Explorer
Navigate to the NERO Testnet Explorer in your web browser.
Step 2: Locate Your Contract
Enter your contract’s deployment address in the search box at the top of the explorer page.

Figure 3: Searching for your contract by address
Step 3: Access the Verification Page
On the contract details page, locate and click the “Verify and Publish” button.
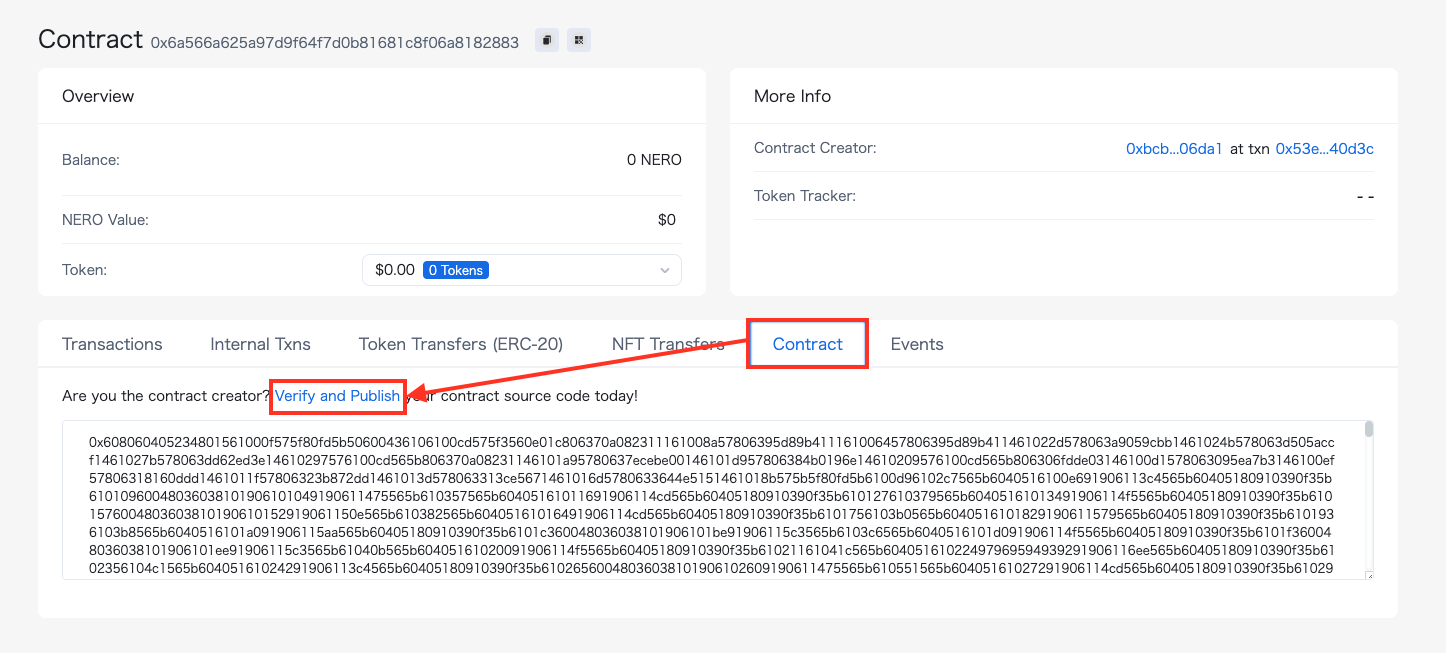
Figure 4: Contract details page with verification option
Step 4: Enter Contract Information
Complete the verification form with your contract details:
- Contract Name: Enter the exact name of your contract
- Compiler Version: Select the same version used during deployment
- Optimization: Match your deployment settings
- Source Code: Paste your complete contract source code
- Constructor Arguments: Enter ABI-encoded constructor arguments (if applicable)
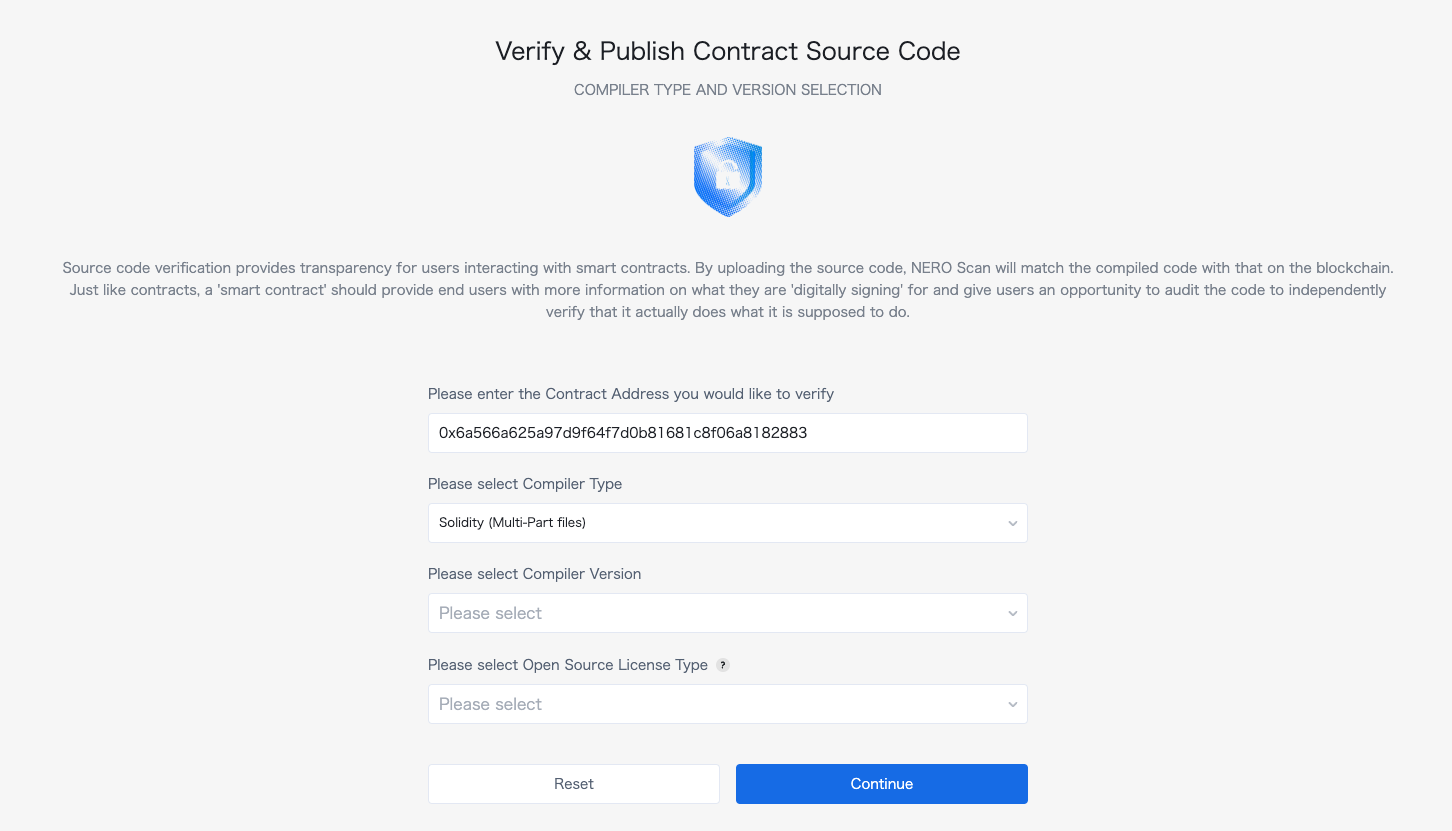
Figure 5: Contract verification form
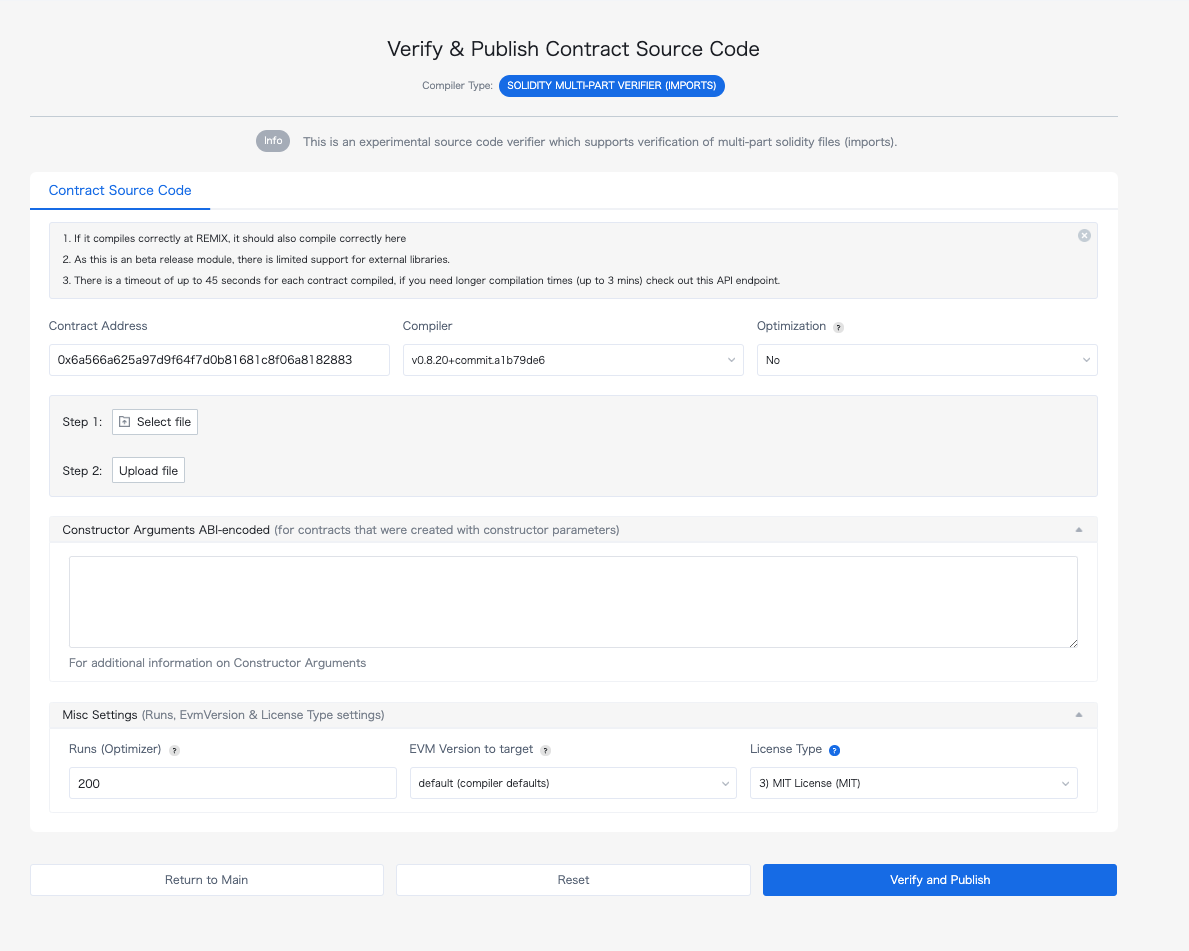
Figure 6: Detailed contract verification settings
Step 5: Complete the Verification
Click the “Verify and Publish” button to submit your information. If successful, your contract’s source code will be publicly viewable on the explorer.
What’s Next?
Once verified, users can:
- Read your contract’s source code
- Interact with your contract directly through the explorer interface
- Have greater confidence in your contract’s security and functionality
For programmatic verification options, see our Hardhat verification guide.